Automated Data Entry: Investors fill out their own contact info, property preferences, and budget.
Smart Vetting: New sign-ups are held in a review queue so you can approve them before they enter your main CRM List.
Personalized Attribution: Links can be tied to specific Disposition Managers for automatic lead routing.
Higher Connection Rates: Includes a "Save Contact Card" feature so buyers can instantly add your team to their phone.
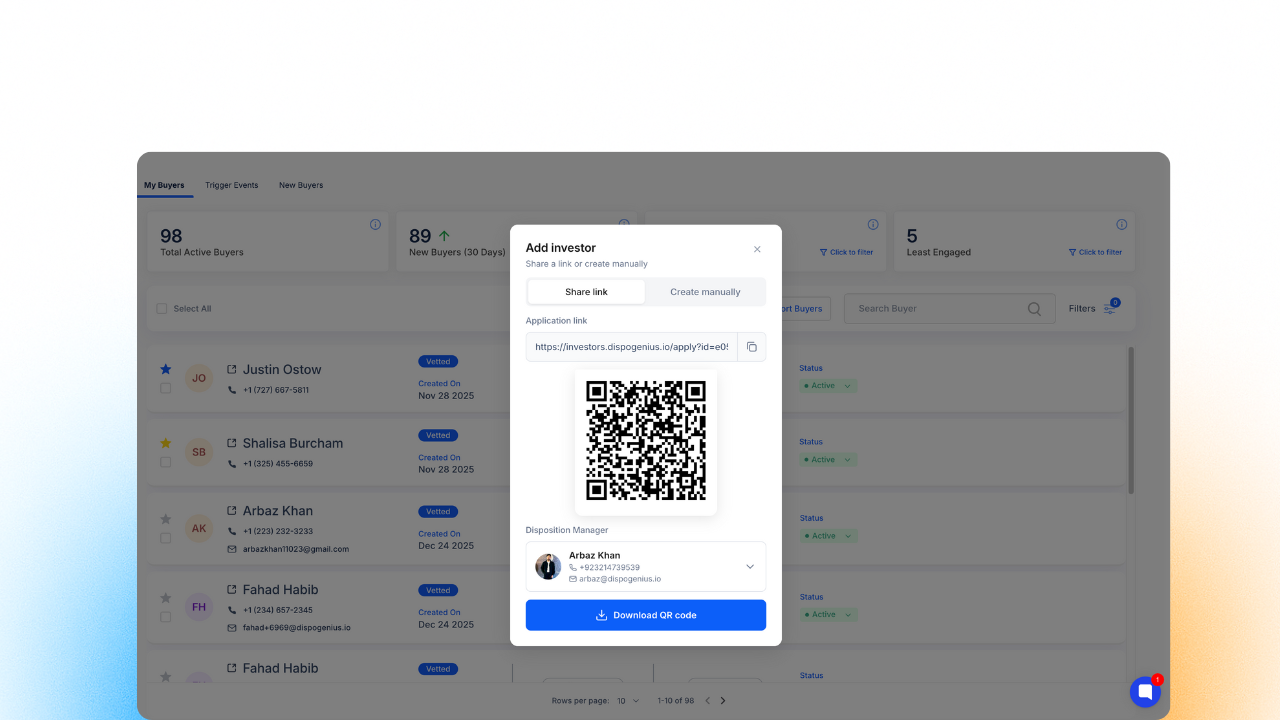
To start intaking buyers, you first need to generate a unique sharing link.
Open the Buyers page from your sidebar menu.
Click the Add Buyer button located at the top of the list.
Assign a Manager: Select the appropriate Disposition Manager from the dropdown. Any investor using this specific link will be automatically assigned to them.
Copy or Download: You can now copy the Link/URL to send via text or email, or download the QR Code to use on physical marketing materials.
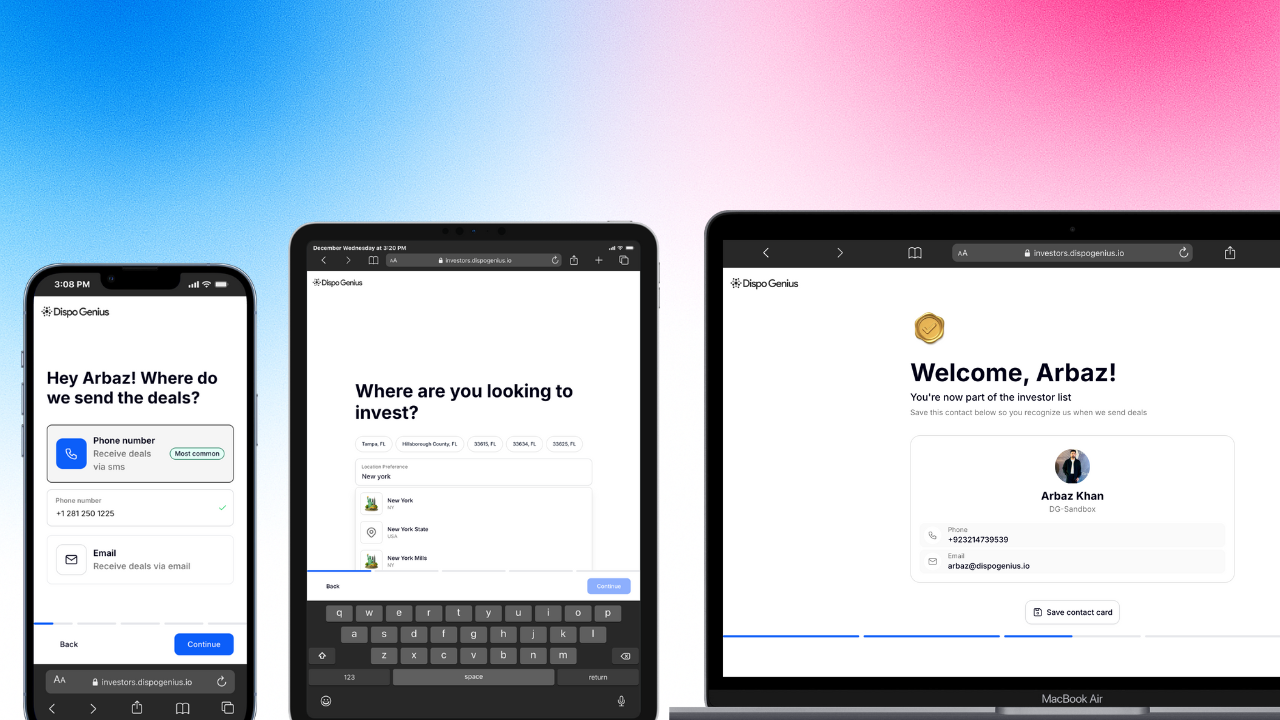
When an investor clicks your link, they are guided through a sleek, mobile-optimized onboarding flow:
Contact & Notification: They enter their name and choose their preferred way to receive deals (SMS or Email).
The Buy Box: They select their target location preferences, property types (Single Family, Multi-Family, etc.), and investment strategies.
Smart Suggestions: The form will suggest the most popular locations in your sub-account to help them finish faster.
Save Contact: On the final screen, they can tap "Save Contact Card" to instantly add your team's details to their phone contacts.
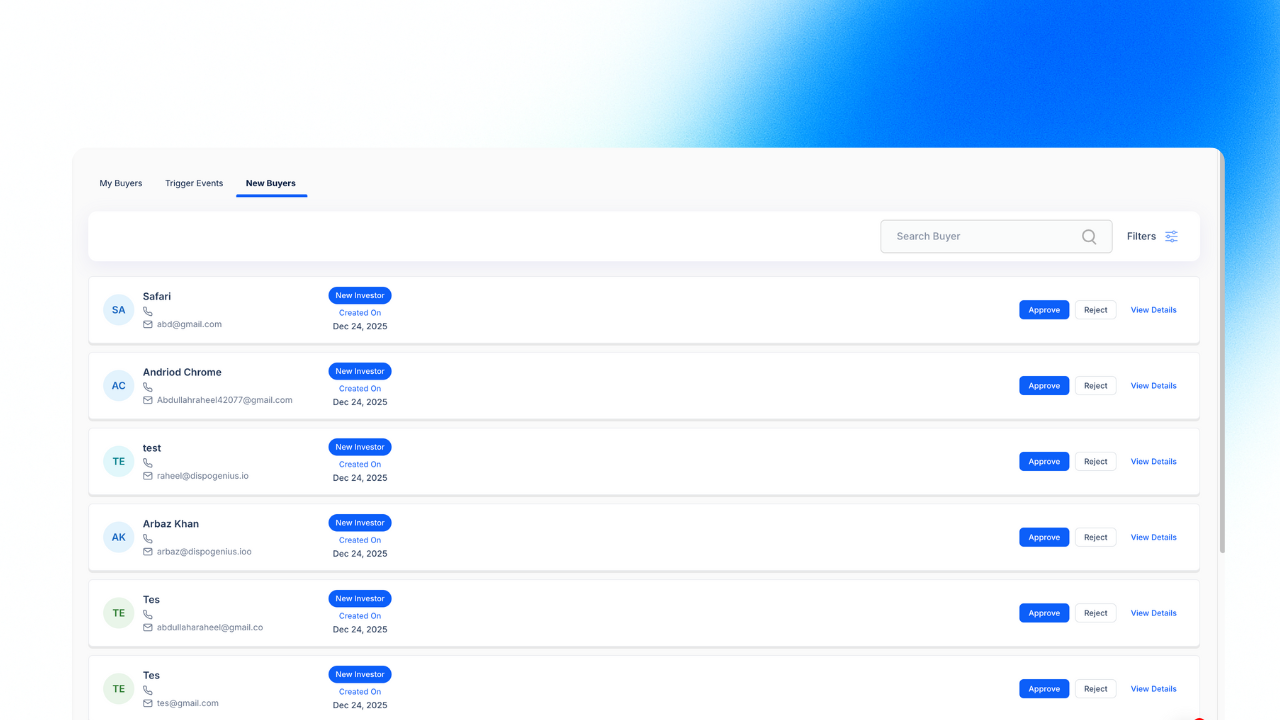
To protect the quality of your list, all automated sign-ups go to a dedicated review area.
Go to the Buyers section and select the New Buyers tab.
Review the Details: Click on a lead to see their full "Buy Box" preferences.
Approve or Reject: Click Approve to officially add them to your active CRM buyers list. If a lead isn't a good fit, click Reject to remove them.
Networking Pro-Tip: Keep your QR code saved as a photo on your phone. When you meet a potential buyer at an event, have them scan it on the spot to get them into your system instantly.
Validation: The form automatically checks if an email or phone number already exists in your system, preventing messy duplicate entries.
Manual Entry: If you are on a live call, you can still use the "Create Manually" tab within the "Add Buyer" menu to fill out these same details on the investor's behalf.